Bread without commercial yeast - Sour-dough
At the time of writing, an extraordinary number of people are in some sort of lockdown, and trying to go the shops less often, and when they do, certain items are in short supply. One of those items is commercial yeast.
If you still have access to flour (preferably strong flour), salt and water, you are still in business.
Sour-dough
Sourdough is the oldest form of leavened bread - it's basically using the natural yeasts (and bacteria) in our environment instead of commercial yeast. It is in some ways, a bit more tricky than normal bread making and in some ways more straightforward. It's very in vogue at the moment, and there's a wealth of resources out there, but I thought I'd summarise what had worked for me, and refer you to some of those if this is something that interests you because the sheer volume out there can be overwhelming.
Starter or Mother Culture
The heart of sour-dough is making a starter, or a culture from which you can always get yeast. To begin with you will need to provide food for the natural yeasts found in the air, or to get started more quickly, some other organic matter.
Try to find a jar with a reasonably wide mouth. A kilner jar works well for me, but if you use one, remove the rubber gasket so you can close the jar but it's not 100% airtight. You can get all sorts of culture jars (and indeed the whole starters) on-line if you want.
I used this this approach with some green grapes to begin my starter. But you can use live yoghurt, or quite a variety of things to provide some initial yeasts. Keep your starter nice and warm if you can, but not hot when you are growing and feeding it. You probably need to feed it for a week to get it really going and even then it might be quite weak until it's a couple of weeks old.
You need to feed your starter periodically. To do this, discard (or use) a little of the starter, and then mix 100 g strong flour and 100 ml of warm water (I use a fork in a measuring jug) and add this to your starter culture. The culture will rise - often dramatically - when fed and fall as the flour is consumed and the growth of yeast slows. How often you need to do this depends on how often you use the culture. If you are getting it going, do this once per day. If, once you have the starter going you don't have time to do this often, put the culture in the fridge when not in use. It won't die but will slow its replication. You can feed it once a week or so in this way.
If you get a brown liquid layer on the top of the culture after a few days of neglect, don't worry. Some people stir this back in. I just discard it and feed. If for whatever reason your starter really fails to take off or goes bad, you can of course start again.
If you plan to bake a sour-dough loaf it's a good idea to feed your culture some hours in advance. It will bubble and rise as the yeast consumes the flour. You ideally want to use the culture while it's still rising (because the flour isn't all spent).
Making bread, first proof
There are as many sourdough recipes for loaves as for bread with commercial yeast. You'll find it's much more dependent on your environment than commercial yeast but this makes it quite interesting. Like a lot of bread making, it often follows a pattern of letting the dough rise twice. The difference is you need to allow more time. This can be a nuisance, but it's also, for me, what makes sourdough fit in with a busy schedule more than regular bread, because you can do one of these stages in the fridge.
I usually use a recipe somewhere between this one and this one.
- 375 g/ 13 oz strong white flour
- 250 g/ 9 oz sourdough starter
- 10 g (2 tsp) salt
- 10 g (2 tsp) brown sugar
- 130-175 ml / 4-6 fl oz tepid water
- olive oil, for kneading
Salt is an important component of making bread, for structure as well as flavour. I sometimes usejust a smidgen more than usual as above (you can use 7 g if you find this too much). Brown sugar is optional but can help the dough along.
Add the water gradually, the dough can go from too dry to awkwardly wet in short order. It's easier to work with drier dough, but I'd recommend having it just a little wet to help the next stages. Remember the starter is already adding a lot of liquid content (and flour).
Sourdough normally takes a bit more time to knead and stretch. I have large hands and sometimes find the proposed times in recipes are too long. Take the guesswork out by doing the window test - cut off a piece of dough and stretch it to the light. If it can be made translucent without it quickly breaking then the structure is elastic enough and you are ready to let it rise.
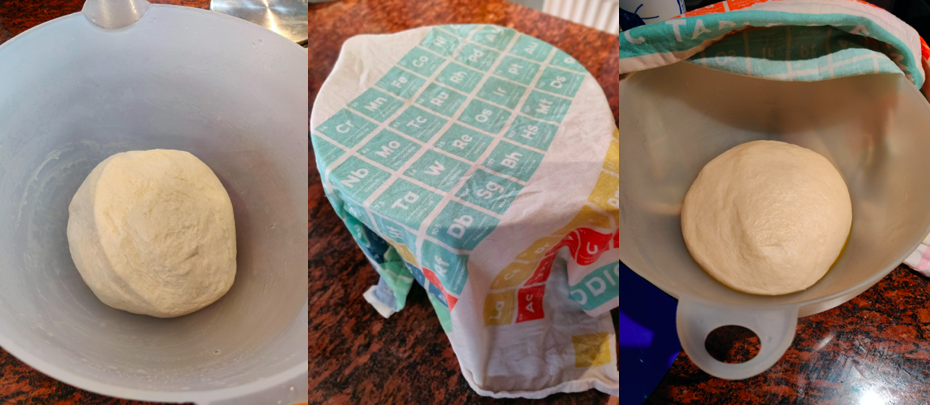
Put the dough in a bowl (the one you used to mix it is fine), cover with a wet tea towel, and leave to rise. It will tend to spread more than rise vertically than regular bread and be slower. It'll probably take three hours or so, but you will find your own routine with this.
Second rise
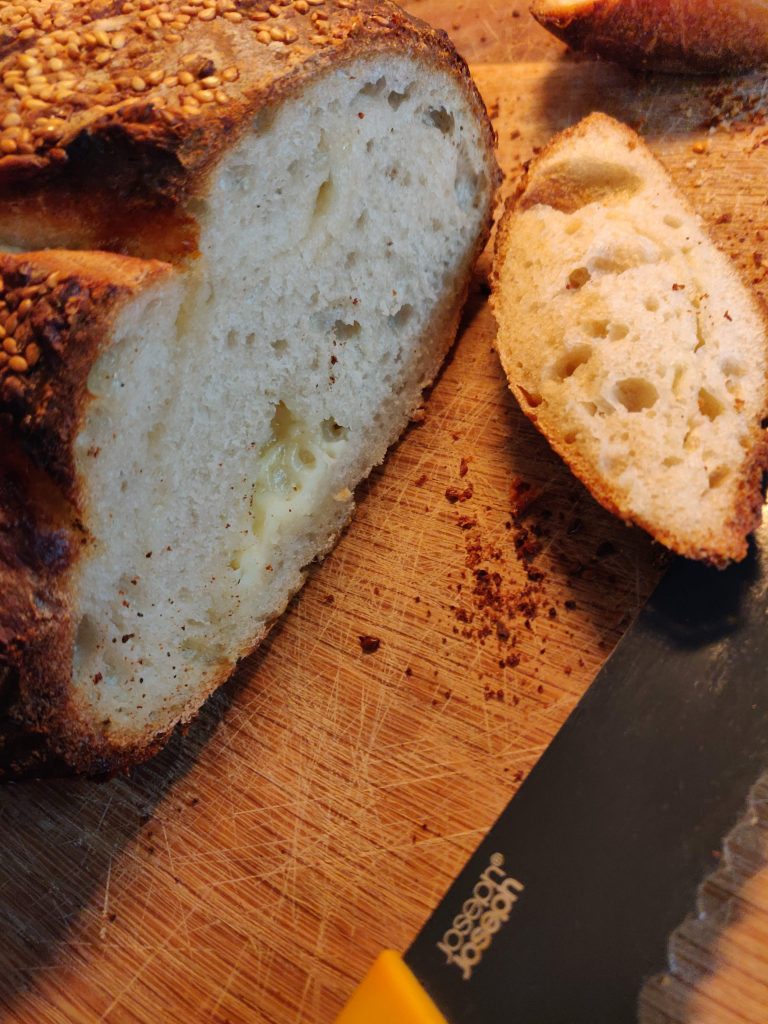
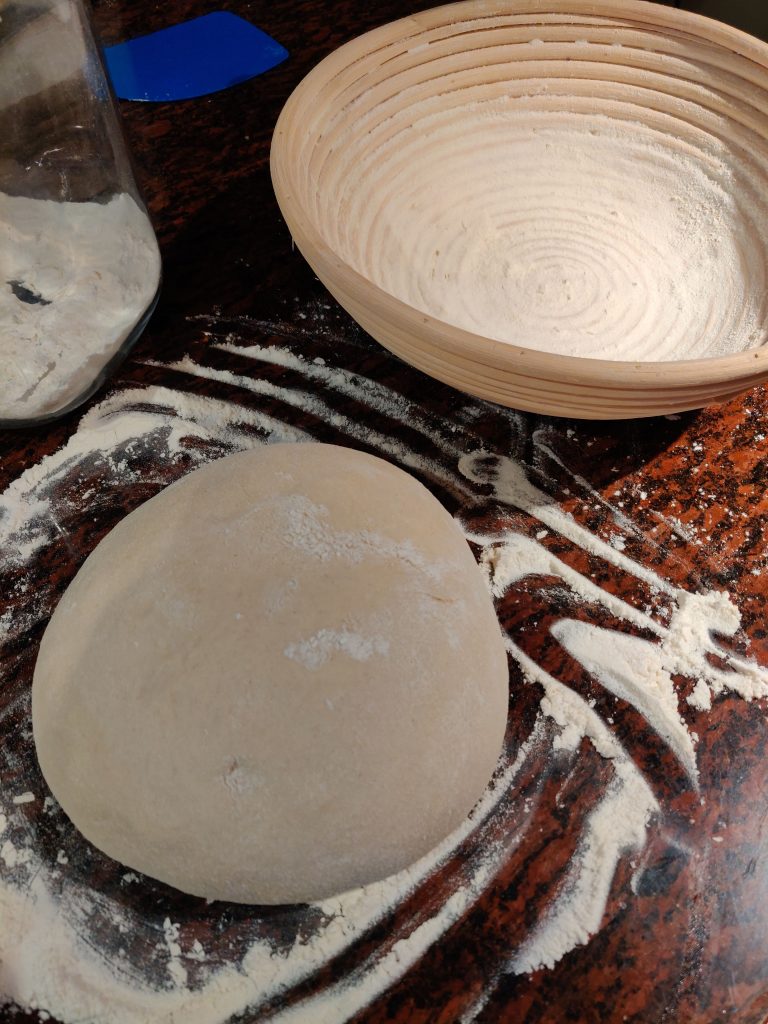
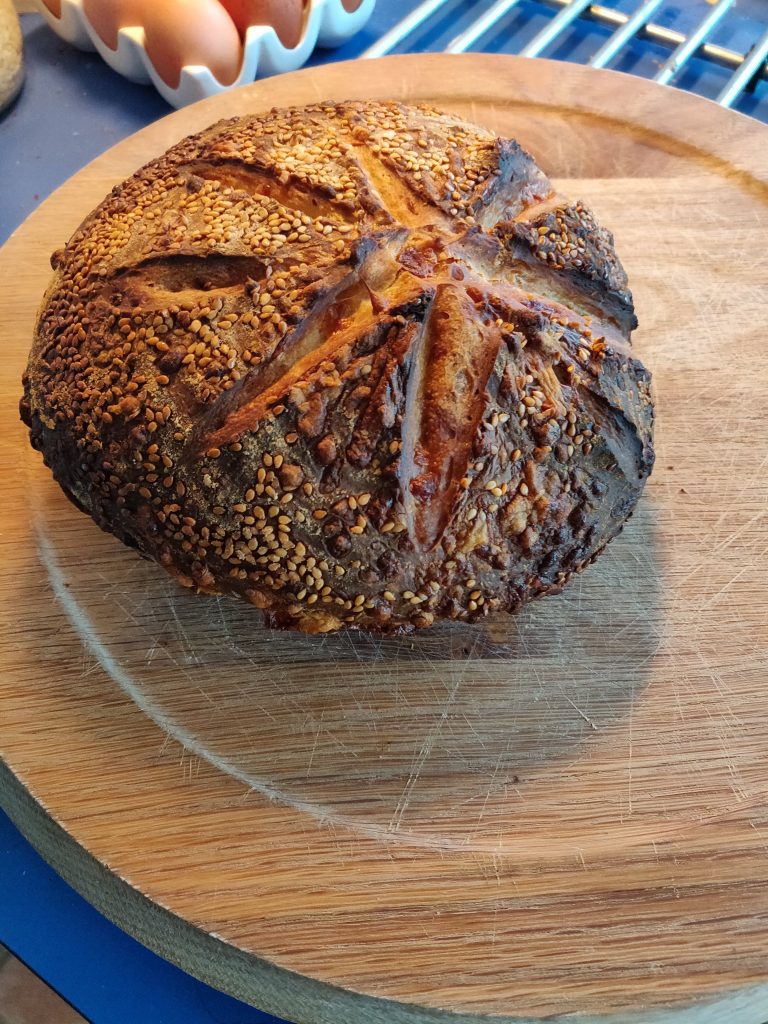
Now take out your dough and gently shape it. Knock out some of the air but don't be too rough. If you fancy trying to incorporate other ingredients, like bacon, or cheese or sundried tomatoes, you can do it now. Don't add too much at first if you are experimenting. The loaf pictured here had some cubes of cheddar, a little less than 1 cm a side added at this stage. If you have a banneton - or proving basket, liberally sprinkle it with flour, but you can make do with a bowl and towel. See this video for details, which is also a really good reference anyway.
Try your best to ensure you have the dough back into a ball, or at least seal and seam as best you can.
If you have sesame seeds or poppy seeds you'd like to add, just wet your hand, wet the dough with them and sprinkling them on top. Grated cheese also works well, sparingly.
Place your dough top down into your bowl. You can cover this (I use a clean bin bag that I will next use in my pedal bin after I finish using it for this). This second rise can take quite a while. Maybe up to five hours. But for me, this is the best part of sourdough - you can place this all in the fridge. The rise will continue, but very slowly. In the fridge give it 9 - 12 hours or more, overnight it best.
So you can start your dough around 8 pm, let it rise for three hours, shape and put it in the fridge, and bake it the late morning. Again, you will find your own routine.
The dough is ready when you press it slightly and the indentation remains or bounces back only very slowly.
In the Oven
Carefully extract your dough from your bowl or banneton, it may be quite sticky, especially if you didn't flour the banneton enough.
Make a few slashes in the top of the dough with a very sharp thin knife. These help regulate the rise.
Some people like to bake the bread in a Dutch Oven - a cast iron pot. With an initial bake with the lid on, and then a while with the lid off. I don't possess such a thing. You can use a baking tray, but I tend to use my invaluable pizza stone. Again, work out what works for you.
I preheat the oven to 230C or 210C fan. You need a good hot start so make sure it is up to heat. You can add a deep tray with cold water in the bottom shelf of your oven to help get a nice deep crust. I bake for 25 minutes at that temperature and then drop the oven temperature by 20 degrees for the last 10 minutes. Again, you will find your own sweet spot depending on your oven.
Share and share a like
Once you get your starter culture going, it's easy to give some to someone else. Just pour some into a clean jar, and feed. Feed the rest of your original culture and you can now easily give half away.