OPUS and Assessment 1 - The Basics
OPUS is a FOSS (Free and Open Source Software) web application I wrote at Ulster University to manage work based learning. It has been, and is used by some other universities too.
Among its features is a way to understand the assessment structure for different groups and how it can change over years in such a way that legacy data is still correct for audit.
You don't have to use the in-built assessment functionality in OPUS, but the features were written to promote transparency of assessment, and ensure all stakeholders could easily access assessment information for a student.
So here's how to do it, it takes a bit of set-up but then should run smoothly until you ever decide to change how you assess. This is one of a short series on the matter.
Assessment Regimes
OPUS uses a "bank" of individual assessments that can be built from different weightings into as assessment regime. To be precise OPUS provides a means of capturing the rubric for each assessment and the feedback to students. Each assessment has a Smarty template which "skins" the assessment form. These can be found in the Assessment section of the Advanced tab of the admin interface.
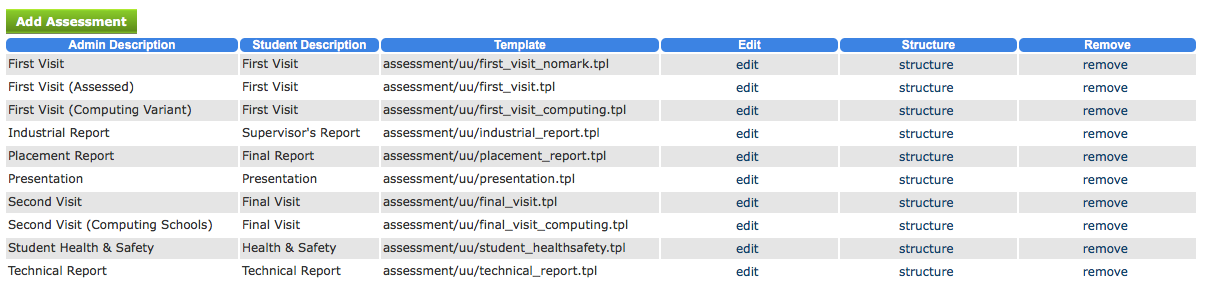
A list of OPUS assessments
For most people using OPUS, you build an assessment regime from these components in a pick and mix fashion. Head to the Configuration tab, and select Assessment Groups. This may well be empty, in an out-of-the-box install, in which case create a group with an appropriate name and some commentary on what it is for.
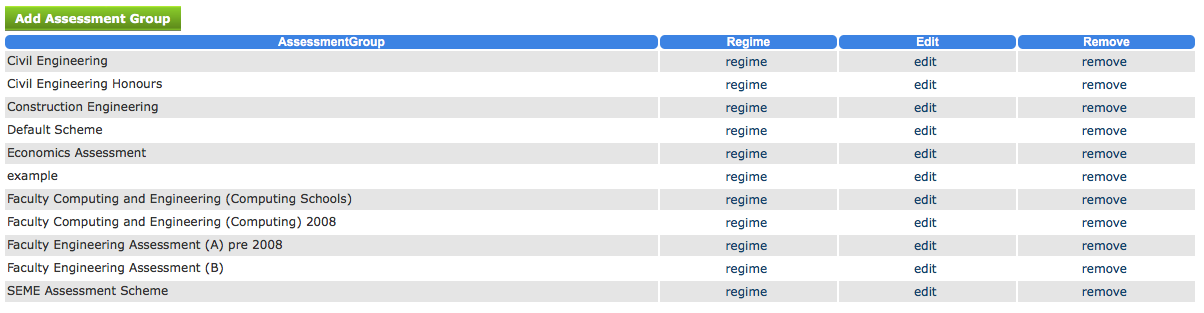
A list of Assessment Groups
Once you have a group, you will see an option to edit the regime that is associated with it.

A typical assessment regime.
When we add an item, a dialog appears to enter some information.
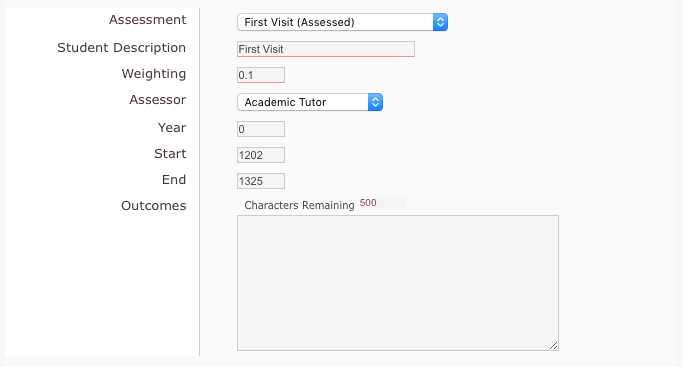
A regime item.
In this we pick which of the assessments from the very start we want to use, you might decide, for instance, to use the same assessment twice in a given regime, at different stages. Give the student a description of what the assessment name should be for them, a weighting (which could be zero for formative only assessments).
You can also specify who should assess this - it could be the academic tutor assigned to the student, the workplace supervisor, the student themselves or labelled as "other".
The year is specified in relation to the year of placement, and should usually therefore be zero. Finally start and end are the month and day (MMDD) for when work should begin on such assessments, and the deadline. These are used to help prompt staff and order assessments for students.
Adding Regimes to Programmes
Once an assessment regime has been created, you need to tell OPUS you want to use it with students in a given programme.
Go to Configuration and then Organisation Details and get to the school of study that's relevant and pull up their list of programmes. For each programme you can click on assessment, from here you can select which regime is appropriate for the programme, and the year in which the regime started and ended being valid. You can leave out an end year to let the decision roll on.
More often than not you wish to apply these changes to at least a School. Clicking on Bulk Change Assessment will allow you to select all the programmes within a School, the new assessment regime you want and the start year, and it will do the rest.
Once you have done this the functionality in OPUS to show the assessments, their structures and marks, and to enable marking will appear for all relevant students and the staff working with them.
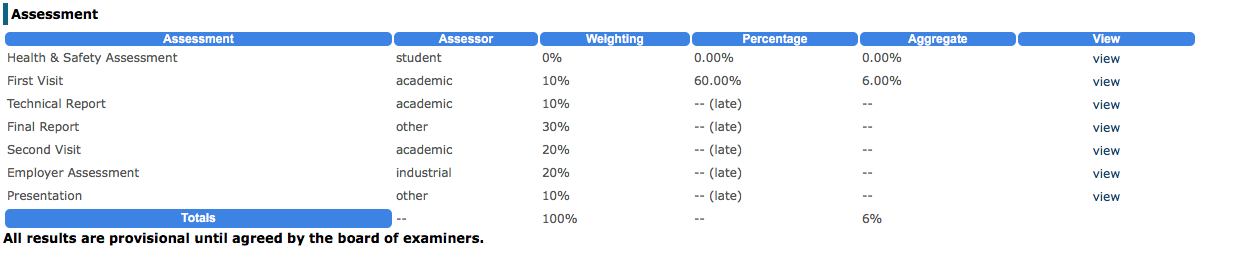
Sample Assessment Information
A table like that above will appear under each related student (this one is dummy information) and students can click view to see the pro-forma whether complete or not to understand how they will be assessed, or what the results were as appropriate.
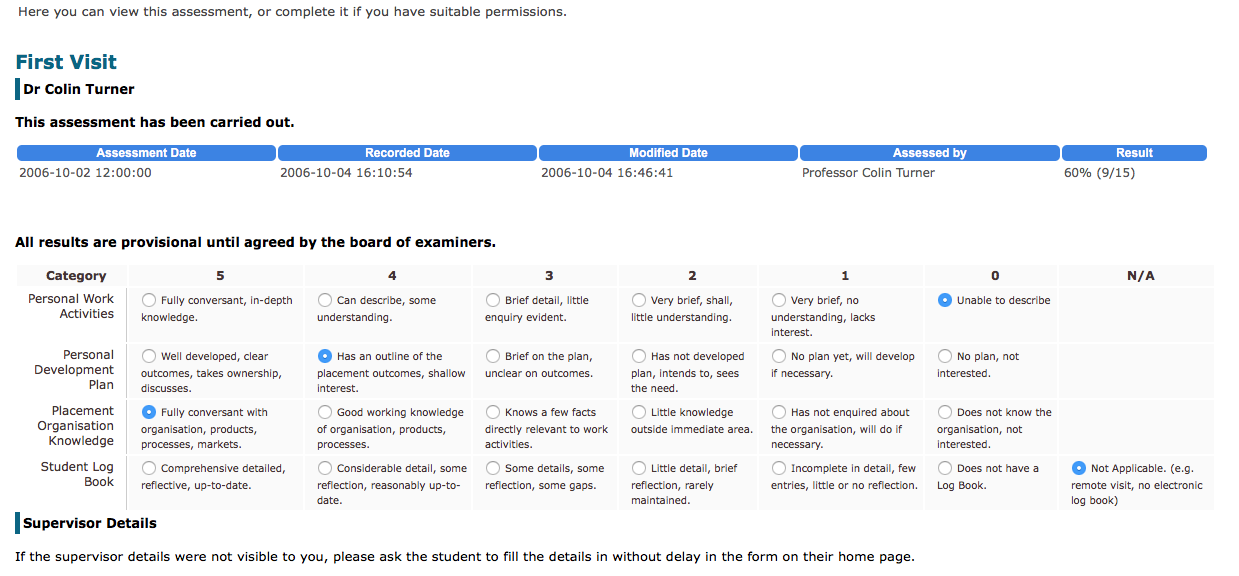
An assessment pro-forma
Naturally staff who have no business with a student cannot see the marks or information pertaining to them.
When completing an assessment on a student a member of staff has 24 hours to edit their findings before the results "lock" and can only be removed by an administrator - this allows most minor errors to be corrected.

2 thoughts on “OPUS and Assessment 1 - The Basics”